The handwritten digits recognition may be your first project when you get started with Tensorflow or Pytorch, and the dataset used in this project is the Mnist database of handwritten digit.
What is Mnist?
Introduction
The MNIST database (Modified National Institute of Standards and Technology database) is a large database of handwritten digits that is commonly used for training various image processing systems.The database is also widely used for training and testing in the field of machine learning.It was created by “re-mixing” the samples from NIST’s original datasets. Source: Wikipedia.
Get Mnist
You can download the Mnist database from its website, http://yann.lecun.com/exdb/mnist/index.html.
There are four compressed files incluing training set images, training set labels, test set images and test set labels.
The format of Mnist
The data of Mnist is stored in a very simple file format. However, you can’t open them with common application program, and you need write your own program to read these files.
The above website has given the format of both image files and label files.
Oh, there is a little problem about thd data.
All the integers in the files are stored in the MSB first (high endian) format used by most non-Intel processors. Users of Intel processors and other low-endian machines must flip the bytes of the header.
It points out that the integers in the files is differen from the integers in Intel processor which used by most people’s computers.
Let’s use 0x00000102 as an example. We start the memory address from 0x0000.
In Intel processor, the 0x00000102 was stored like this.
| address | value |
|---|---|
| 0x0000 | 0x02 |
| 0x0001 | 0x01 |
| 0x0002 | 0x00 |
| 0x0003 | 0x00 |
In most non-Intel processor, it likes this.
| address | value |
|---|---|
| 0x0000 | 0x00 |
| 0x0001 | 0x00 |
| 0x0002 | 0x01 |
| 0x0003 | 0x02 |
Now, you have known the difference.
The format of images
[offset] [type]          [value]          [description]
0000     32 bit integer  0x00000803(2051) magic number
0004     32 bit integer  60000            number of images
0008     32 bit integer  28               number of rows
0012     32 bit integer  28               number of columns
0016     unsigned byte   ??               pixel
0017     unsigned byte   ??               pixel
........
xxxx     unsigned byte   ??               pixel
Pixels are organized row-wise. Pixel values are 0 to 255. 0 means background (white), 255 means foreground (black).
The first integer is a magic number 0x803. I guess it was used to comfirm whether the file is parsed correctly. You can compare your first interget with 0x803 when you read the file using your own program.
The next three integers are number of images, the rows of image and the cols of image. Their meaning is obvious.
Other data is the pixel of images, ranging from 0 to 255.
The format of Labels
[offset] [type]          [value]          [description]
0000     32 bit integer  0x00000801(2049) magic number (MSB first)
0004     32 bit integer  60000            number of items
0008     unsigned byte   ??               label
0009     unsigned byte   ??               label
........
xxxx     unsigned byte   ??               label
The labels values are 0 to 9.
The first integer is also a magic number, but it is different from the image files. The next integer is number of labels.
Other data is the label of images, ranging from 0 to 9.
Load Mnist via Python
We will import a python package help us to produce the bytes data effectively.
It is struct which is a build-in class of python. The struct class is very easy, you can learn about it from Python API reference manual.
Load images
import matplotlib.pyplot as plt
import numpy as np
import struct
import math

def load_image(filename, count=-1):

    size = struct.calcsize(">IIII")
    try:
        with open(filename, 'rb') as file:
            buffer = file.read(size)
            magic, number, row, col = struct.unpack(">IIII", buffer)

            if magic != 0x803:
                print("parse error!")
                return

            if count == -1 or count > number:
                count = number

            # read image
            size = count * row  * col
            size = struct.calcsize('>' + str(size) + 'B')
            buffer = file.read(size)
            images = struct.unpack('>' + str(size) + 'B', buffer)
            images = np.reshape(images, [count, row * col])
    except FileNotFoundError:
        print("file \"%s\" not found!" % filename)

    return images
First, we need to read four integers in the head of images file. Then we verify the magic number, there are some bugs if they are not corressonding.
After that we read some images accoding to a variant count.
Now, you may understand the steps of struct.
- use function
calcsizeget the size of bytes. - read some bytes from file.
- use function
unpackget some variants according to designative format.
Finally, the variant images is a long vector, it is necessary to reshape it use numpy before return it.
Load labels
def load_label(filename, count=-1):
    size = struct.calcsize(">II")
    try:
        with open(filename, 'rb') as file:
            buffer = file.read(size)
            magic, number= struct.unpack(">II", buffer)

            if magic != 0x801:
                print("parse error!")
                return

            if count == -1 or count > number:
                count = number

            # parser image
            size = struct.calcsize('>' + str(count) + 'B')
            buffer = file.read(size)
            labels = struct.unpack('>' + str(count) + 'B', buffer)
    except FileNotFoundError:
        print("file \"%s\" not found!" % filename)

    return labels
The code of load_label is same as load_image. You are so smart that you will understand it.
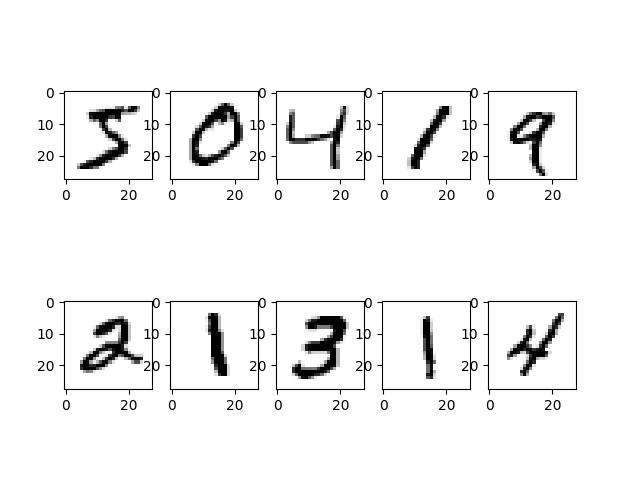
Show images
def show_image(images, count):
    figure = plt.figure()
    plt.subplots_adjust(left=0.1, right=0.9, bottom=0.1, top=0.9, hspace=0.2, wspace=0.2)
    for i in range(count):
        image = np.reshape(images[i], [28, 28])
        ax = figure.add_subplot(math.ceil(count/5), 5, i+1)
        ax.imshow(image, cmap=plt.cm.binary)

    plt.show()
We use matplotlib to show loaded images.
The result: